How to Install WordPress on cPanel: A Step-by-Step Guide
19 Aug, 2024
Dash Arabia Customer Service

How to Install WordPress on cPanel
How to Install WordPress on cPanel: A Step-by-Step Guide
Introduction
Keywords: WordPress installation, cPanel, website setup, CMS, blogging platform
WordPress is a powerful and user-friendly content management system (CMS) that powers millions of websites worldwide. Installing WordPress on your cPanel hosting account is a straightforward process. This guide will walk you through the steps, from creating a database to setting up your WordPress site.
Step-by-Step Installation
1. Create a Database
- Log in to your cPanel account.
- Navigate to the “Databases” section.
- Click on “MySQL Databases”.
- Create a new database with a unique name.
- Create a database user and assign it to the database.
- Generate a strong password for the database user.
2. Install WordPress
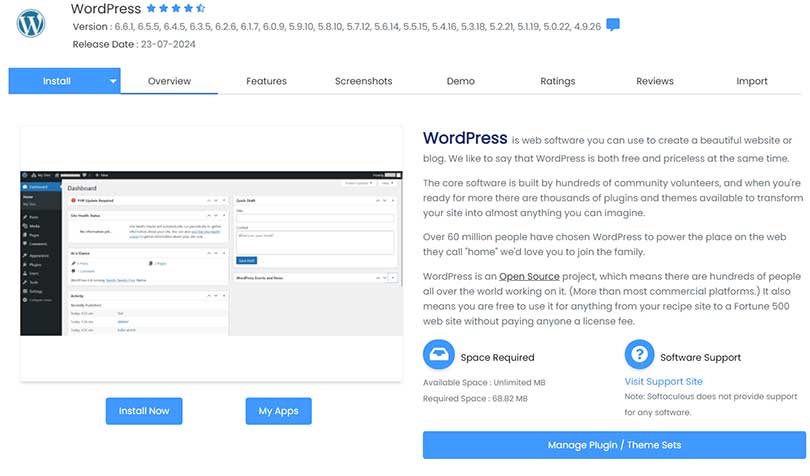
- In cPanel, locate the “Softaculous Apps Installer” or a similar application installer.
- Search for “WordPress” and click on the install button.
- Choose the domain where you want to install WordPress.
- Enter the database details you created in the previous step.
- Select a site name and description (these can be changed later).
- Choose an admin username and password.
- Click the “Install” button.
3. Access Your WordPress Dashboard
- Once the installation is complete, you will receive login details.
- Open your website’s domain in a web browser.
- You will be redirected to the WordPress login page.
- Enter your admin username and password to access the WordPress dashboard.
Essential Post-Installation Steps
- Update WordPress Core: Navigate to the “Updates” section in your WordPress dashboard and update WordPress to the latest version.
- Install Essential Plugins: Consider installing plugins for security, SEO, performance optimization, and other functionalities based on your website’s needs.
- Choose a Theme: Select a WordPress theme that matches your website’s design and style. You can choose from thousands of free and premium themes.
- Create Pages and Posts: Start building your website’s content by creating pages (static content) and posts (blog articles).
- Customize Settings: Explore the WordPress settings to configure your website’s appearance, permalinks, reading settings, and more.
Tips for Optimal Performance
- Optimize Images: Compress images before uploading them to improve website loading speed.
- Enable Gzip Compression: This can significantly reduce page load times. Check your cPanel for options to enable Gzip compression.
- Use a Caching Plugin: A caching plugin can improve website performance by storing static versions of your pages.
- Choose a Reliable Hosting Provider: A fast and reliable hosting provider is crucial for website performance.
Conclusion
By following these steps, you’ve successfully installed WordPress on your cPanel hosting account and taken the first steps towards building your website. Remember to keep your WordPress installation updated with the latest version and security patches.
